
 Mark
Mark
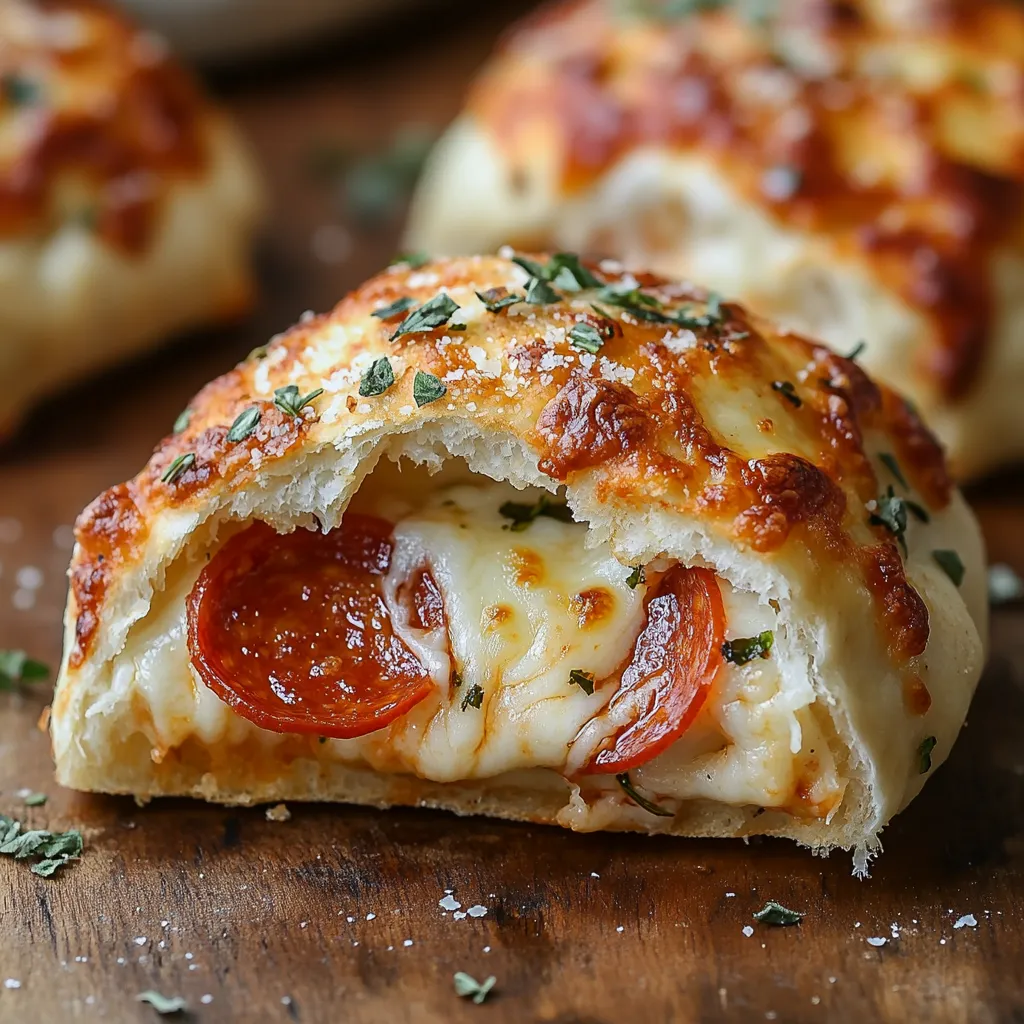
These irresistible pepperoni pizza bombs transform simple biscuit dough into addictive, cheese-filled treasures that disappear minutes after leaving the oven. They're my go-to solution when pizza cravings strike but I need something more fun and portable than traditional slices.
I first made these for my nephew's birthday party when I needed something quick that would please both kids and adults. They were such a hit that they've become our family's mandatory movie night treat.
Ingredients
- Refrigerated biscuit dough: Gives you a perfect bread texture without making dough from scratch
- Pizza sauce: Adds classic flavor look for one with real tomatoes and minimal additives
- Shredded mozzarella cheese: Creates that perfect stretchy pull when you bite in
- Pepperoni slices: Provide savory spicy flavor choose thicker cut for more impact
- Melted butter: Helps create a golden crispy exterior
- Garlic powder: Adds aromatic flavor without the burning risk of fresh garlic
- Italian seasoning: Brings herbal notes that complement the pizza flavors
- Grated parmesan cheese: Creates a delicious savory crust when baked
Step-by-Step Instructions
- Prepare Your Workspace:
- Preheat your oven to 375°F and line a baking sheet with parchment paper to prevent sticking. Gather all ingredients measured and ready to go for assembly line efficiency.
- Prepare The Biscuit Dough:
- Take each cold biscuit and flatten it into a 4inch circle using your palm or a rolling pin. Work gently to avoid tears but make sure thickness is even throughout for proper cooking.
- Add The Filling:
- Place exactly one teaspoon of pizza sauce in the center of each flattened biscuit being careful not to overfill or spread too close to edges. Layer with exactly 3 pepperoni slices slightly overlapping and add approximately 2 tablespoons of mozzarella cheese on top.
- Seal The Bombs:
- Working with one bomb at a time bring the edges of the dough up and over the filling pinching firmly to seal completely. Roll gently between your palms to form a smooth ball ensuring no filling is exposed.
- Position For Baking:
- Place each formed bomb seam side down on your prepared baking sheet keeping them about 2 inches apart to allow for expansion during baking.
- Apply Flavor Coating:
- Mix melted butter with garlic powder and Italian seasoning until well combined then use a pastry brush to generously coat the top and sides of each dough ball.
- Add The Final Touch:
- Sprinkle parmesan cheese evenly over the tops of the buttered bombs to create a savory crust when baked.
- Bake To Perfection:
- Bake in the preheated oven for 1518 minutes watching carefully the last few minutes. Look for a deep golden brown color and slight bubbling around the seams indicating the cheese inside has melted.

My absolute favorite part of this recipe is watching everyone's face light up when they pull apart that first bomb and see the melty cheese stretch between their fingers. My daughter calls it "pizza magic" and insists we make double batches every time.
Make Ahead Options
These pizza bombs can be fully prepared up to 24 hours before baking. Simply assemble them completely stop before the butter coating step and refrigerate covered with plastic wrap. When ready to bake remove from refrigerator brush with the seasoned butter add parmesan and bake as directed adding 23 minutes to the cooking time.
Flavor Variations
Transform these bombs into different pizza experiences by swapping ingredients. Try cooked Italian sausage and bell peppers for a supreme version or pineapple and ham for Hawaiian style. Vegetarian options work beautifully with sautéed mushrooms spinach and onions. Just ensure any raw vegetables are precooked to remove excess moisture that could make your bombs soggy.
Serving Suggestions
While these pepperoni pizza bombs are incredible on their own they shine as part of a larger spread. Serve alongside a simple green salad dressed with Italian vinaigrette for a complete meal. For parties arrange on a platter surrounded by ramekins of warm pizza sauce marinara and ranch dressing for dipping options. They pair perfectly with both red wine and cold beer making them versatile for various occasions.

Questions About Recipes
- → Can I use homemade dough instead of biscuit dough?
Yes, you can use homemade pizza or bread dough, but ensure it is rolled thin enough to wrap around the filling easily.
- → What other fillings can I use?
You can try fillings like cooked sausage, sautéed mushrooms, or chopped vegetables for variations.
- → How do I prevent them from bursting while baking?
Ensure the edges are sealed properly by pinching them tightly together to secure the filling inside.
- → Can I prepare these ahead of time?
Yes, assemble them and store in the refrigerator for up to 24 hours before baking. Bake fresh for best results.
- → What dipping sauces pair well with these bombs?
Marinara sauce, garlic butter, or ranch dressing are excellent accompaniments for these cheesy treats.