
 Mark
Mark
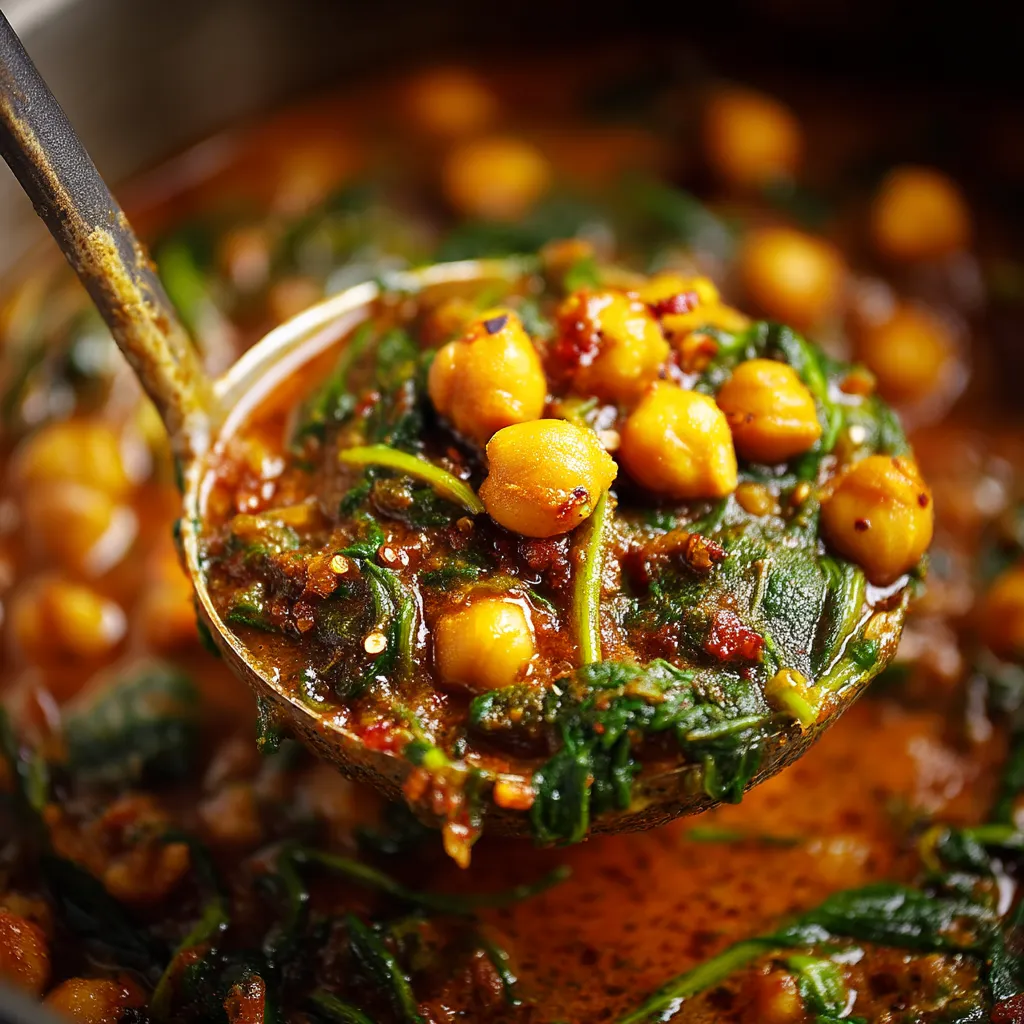
This chickpea and spinach curry has become my go-to meal when I crave something hearty, nutritious, and incredibly satisfying without spending hours in the kitchen. The fragrant spices, creamy coconut milk, and tender vegetables create a dish that tastes like it's been simmering all day, even though it comes together in just 40 minutes.
I first created this curry during a particularly busy week when I needed something nourishing but had little time to cook. My family was initially skeptical about a meatless curry, but they've requested it weekly ever since that first bite. The way the kitchen fills with aromatic spices has become our signal that comfort food is on its way.
Ingredients
- Vegetable oil: provides the base for sautéing without overpowering the delicate spices
- Onion: creates a sweet aromatic foundation for any good curry
- Fresh garlic and ginger: form the flavor backbone that no curry should be without
- Green chili: adds a pleasant heat that builds rather than overwhelms
- Chickpeas: provide hearty protein and satisfying texture that makes this dish substantial
- Fresh spinach: wilts beautifully into the curry adding color nutrition and a silky texture
- Diced tomatoes: create acidity and depth while thickening the sauce naturally
- Full fat coconut milk: delivers richness and creaminess that balances the spices perfectly
- Cumin and coriander: bring warm earthy flavors essential to authentic curry
- Garam masala: adds complexity with its blend of warming spices
- Turmeric: contributes golden color and subtle earthy notes plus anti inflammatory benefits
- Fresh lemon juice: brightens all the flavors and balances the richness
Step-by-Step Instructions
- Sauté the Aromatics:
- Heat your oil in a large heavy bottomed pan over medium heat until it shimmers. Add the finely chopped onion, spreading it evenly across the pan. Cook for a full 5 to 7 minutes, stirring occasionally until the onions turn translucent and begin to take on a golden hue. This slow cooking process releases the natural sugars in the onions, creating the first layer of flavor for your curry.
- Build the Flavor Base:
- Add the minced garlic, grated ginger, and chopped green chili if using. Stir constantly for about 90 seconds until intensely fragrant but not browned. The aroma will shift noticeably when these ingredients are properly cooked. Be vigilant during this step as garlic can quickly burn and turn bitter.
- Bloom the Spices:
- Sprinkle all your ground spices directly over the aromatics. Reduce heat slightly and stir constantly for 30 seconds, ensuring the spices coat everything evenly. This brief toasting activates the essential oils in the spices, intensifying their flavors and aromas. The mixture will become fragrant and slightly darker.
- Create the Sauce:
- Pour in the diced tomatoes with their juice, using your spoon to scrape up any spices that might be sticking to the bottom of the pan. Allow this mixture to simmer for 5 minutes, stirring occasionally. The tomatoes will break down slightly and the sauce will begin to thicken as moisture evaporates.
- Develop Depth:
- Add the drained chickpeas, coconut milk, and water or broth to the pan. Stir thoroughly to combine, then bring the mixture to a gentle simmer. Cook uncovered for 10 minutes, stirring occasionally. During this time, the chickpeas absorb flavor while the sauce reduces and becomes more concentrated.
- Incorporate the Greens:
- Add all the fresh spinach to the pan. It will look like a lot at first, but gently fold it into the hot curry and watch as it wilts down dramatically. Continue cooking for 3 to 5 minutes until the spinach is completely wilted and integrated into the sauce.
- Balance the Flavors:
- Remove from heat and season with salt and freshly ground black pepper. Squeeze in the fresh lemon juice if using, which brightens all the flavors. Taste and adjust seasonings as needed, perhaps adding more salt, a pinch more garam masala, or extra lemon juice to achieve perfect balance.

The garam masala is truly the heart of this dish. I remember my grandmother teaching me that this spice blend should always be added toward the end of cooking to preserve its complex aromatics. She would open the jar, close her eyes, and inhale deeply before adding a measured spoonful to her curries. Now I find myself doing the exact same ritual whenever I make this dish.
Storing Your Curry
This chickpea spinach curry keeps exceptionally well, actually improving in flavor as it sits. Store any leftovers in an airtight container in the refrigerator for up to 5 days. The curry will thicken considerably when chilled, so when reheating, add a splash of water or coconut milk to reach your desired consistency. Warm it gently on the stovetop or microwave until heated through. For longer storage, portion the completely cooled curry into freezer safe containers and freeze for up to 3 months. Thaw overnight in the refrigerator before reheating.
Perfect Pairing Ideas
While basmati rice is the classic accompaniment to this curry, there are many ways to enjoy it. Try serving it with warm naan bread for scooping up the sauce, or over cauliflower rice for a lower carb option. For a complete meal, add a side of cooling cucumber raita or a simple kachumber salad with cucumber, tomato, and onion dressed with lemon juice. A dollop of mango chutney on the side adds a lovely sweet contrast to the savory curry flavors.
Make It Your Own
This recipe welcomes adaptations based on what you have available. Swap chickpeas for cooked lentils or white beans if needed. Not a fan of spinach? Try kale, Swiss chard, or even frozen peas instead. For added vegetables, diced sweet potatoes, cauliflower florets, or bell peppers make wonderful additions. Simply add firmer vegetables when you add the chickpeas to ensure they cook through properly. For a protein boost, cubed firm tofu or paneer cheese can be gently folded in during the final minutes of cooking.
Seasonal Variations
During summer months, lighten this curry by using fresh cherry tomatoes instead of canned and adding seasonal vegetables like zucchini or corn. In colder seasons, make it heartier by incorporating root vegetables like carrots or parsnips, adding them after the aromatics to ensure they cook through. For autumn, try adding a small diced pumpkin or butternut squash along with a pinch of cinnamon for a seasonal twist that pairs beautifully with the existing spice profile.
Questions About Recipes
- → Can I use dried chickpeas instead of canned?
Yes, you can use dried chickpeas, but they'll need to be soaked overnight and cooked separately until tender (about 45-60 minutes) before adding to the curry. This requires more preparation time but can enhance flavor and texture.
- → How can I make this curry spicier?
To increase heat, add more fresh green chilies, include a finely diced jalapeño, or incorporate ¼-½ teaspoon of cayenne pepper with the other spices. You can also add a dash of hot sauce at the end to taste.
- → Can I freeze this dish?
Yes, this curry freezes excellently for up to 3 months. Allow it to cool completely, then portion into airtight containers. Thaw overnight in the refrigerator and reheat gently on the stovetop, adding a splash of water if needed.
- → What can I substitute for coconut milk?
For a coconut-free version, try unsweetened cashew cream, heavy cream (if not vegan), or plain yogurt mixed with a bit of water. These alternatives will provide creaminess though the flavor profile will be slightly different.
- → How can I add more vegetables to this curry?
This curry is versatile - try adding diced bell peppers, cauliflower florets, or cubed sweet potato. Add firmer vegetables after the spices and before the tomatoes, giving them more time to cook through.
- → Is this curry suitable for meal prep?
Absolutely! The flavors actually improve after a day in the refrigerator. Store in airtight containers for up to 4 days. Reheat portions as needed, adding a splash of water if the curry has thickened too much.